Scanning with a remote TWAIN scanner using Adobe Photoshop
-
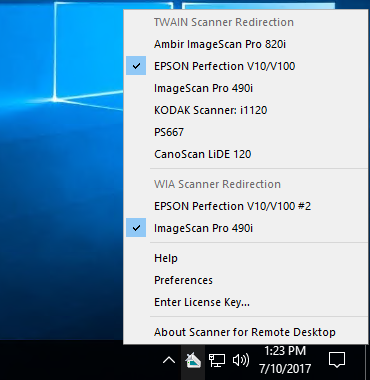
In the tray context menu, select a remote TWAIN scanner (CanoScan LiDE 120 is selected on the screenshot).
-
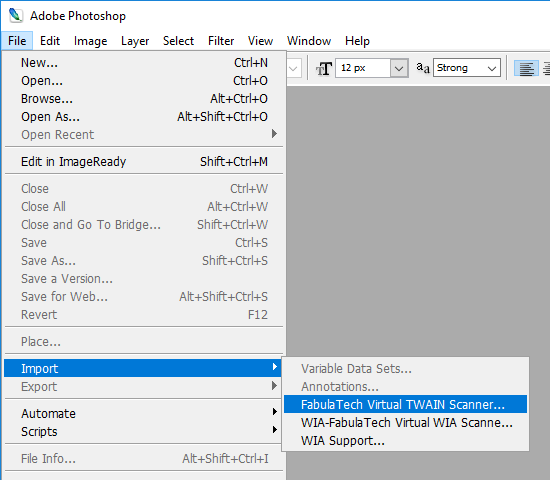
Launch Adobe Photoshop. In the File menu, click Import and select FabulaTech Virtual TWAIN Scanner. A dialog box with scanning settings will appear.
-
In the FabulaTech Scanner Settings window, adjust scanning settings if needed.
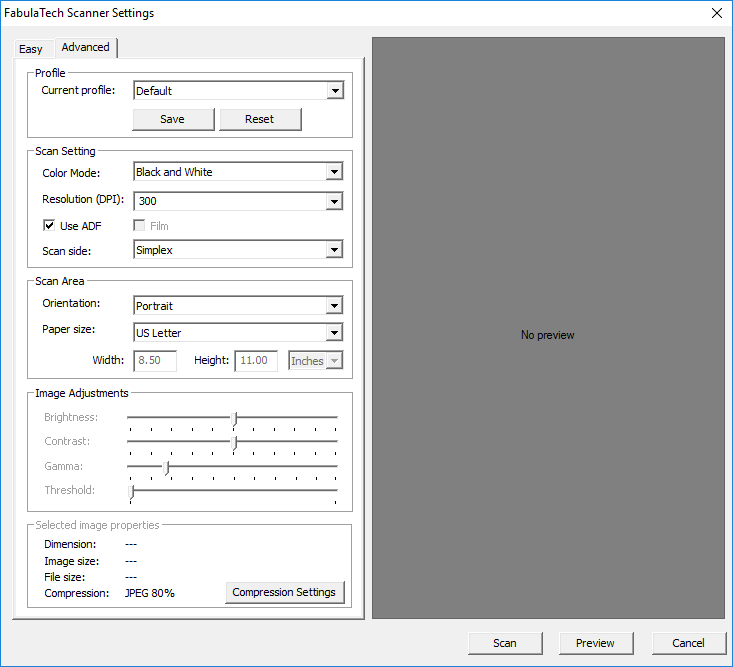
Note: Some settings may be unavailable if your scanner device does not support them.
- Profile
-
Allows you to save all TWAIN scanner settings and later restore them by simply selecting a profile from the list. Last selected profile persists between sessions.
Standard profiles are:
Default: default settings from scanner driver on the Workstation side;
Last Settings: settings saved during the last scan.To save a custom profile, adjust the scanning settings as needed, click the Save as... button and specify a name.
Note: It may be necessary to adjust and save the custom profile again if the hardware is changed, as some settings may be incompatible.
- Source
- Source of the document can be set for scanners that support different sources (e.g., flatbed and automatic document feeder).
- Page setup area
- Contains standard scanning settings, such as Color mode, Resolution, Document size and Orientation.
- Document type
- The type of document medium can be set for scanners that support different types (e.g., paper and film).
- Scan side
- Side or sides of a document to be scanned can be selected for scanners that support duplex (two-sided) scanning.
- Rotation
- Orientation of the resulting image.
- Information area
- Displays image details based on the selected scanning settings and the area selected in the Preview pane.
- Preview
- You can adjust scanning area in the right pane. To do so, first, click Preview button and perform a fast and low-res preliminary scan. Then, click and drag your mouse cursor over the image to draw the exact area you want to scan. (Image size). Adjust the scanning settings as needed and click the Scan button. The program will perform high-quality scan of the selected area.
-
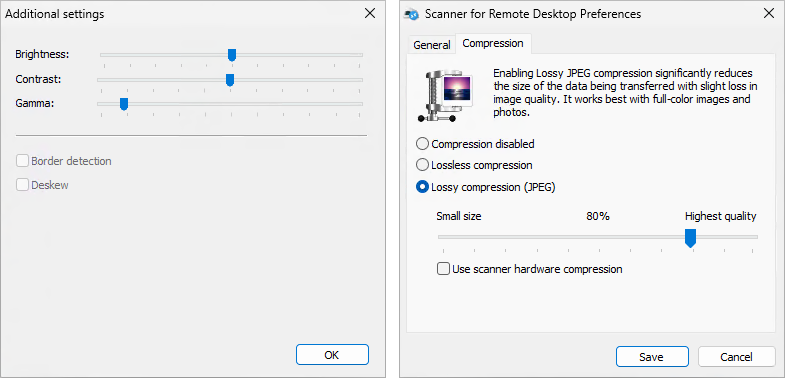
For more options, click Additional settings button. Compression settings can be changed in the program preferences.
- Image adjustments
- Set of controls for adjusting the resulting image. Available options will be different depending on the selected Color mode.
- Discard blank pages
- Skipping of the empty pages can be configured for scanners with automatic document feeder.
- Border detection
- Enables detection of the document edges and cropping.
- Deskew
- Corrects the tilt or angle of the scanned images.
- To scan an image, click the Scan button.